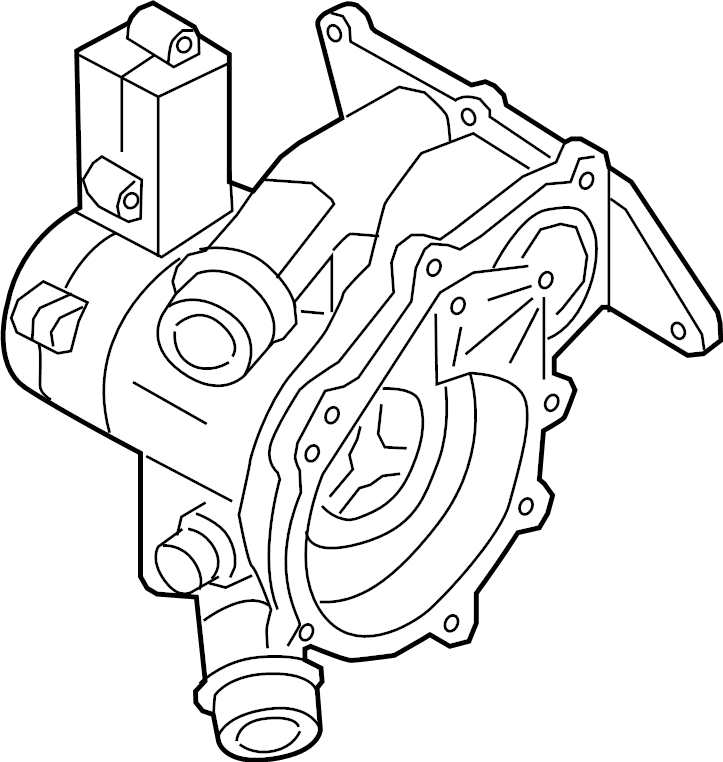
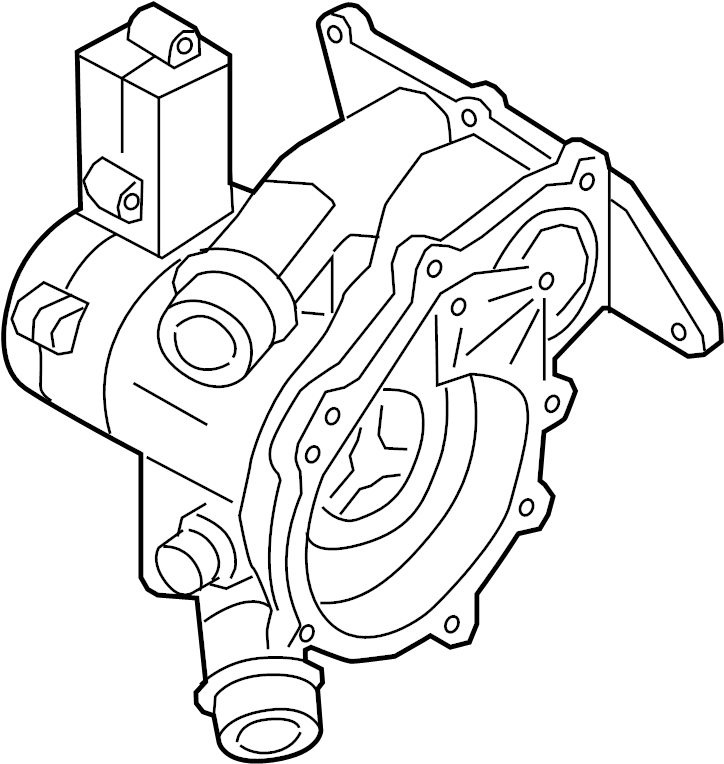
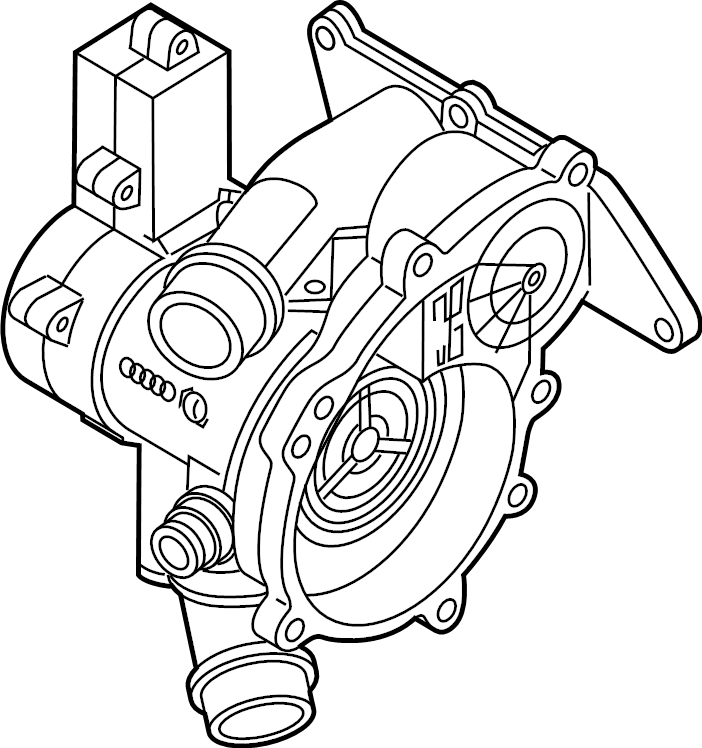


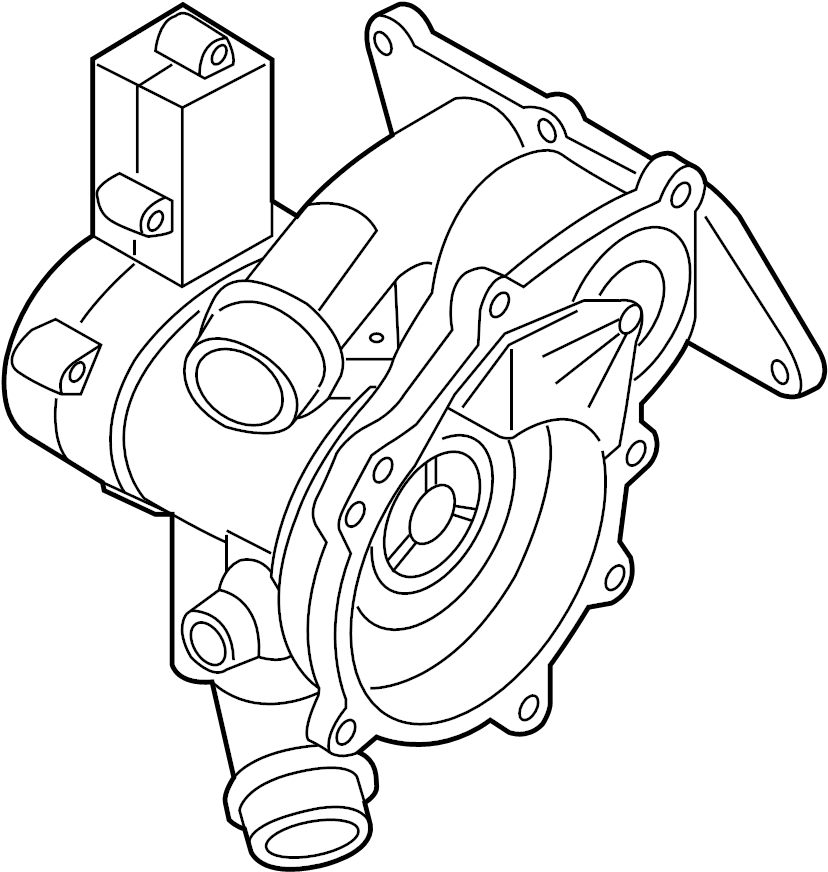
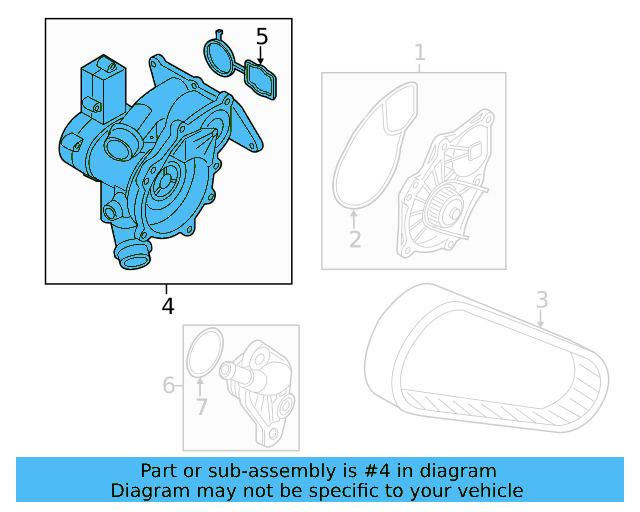
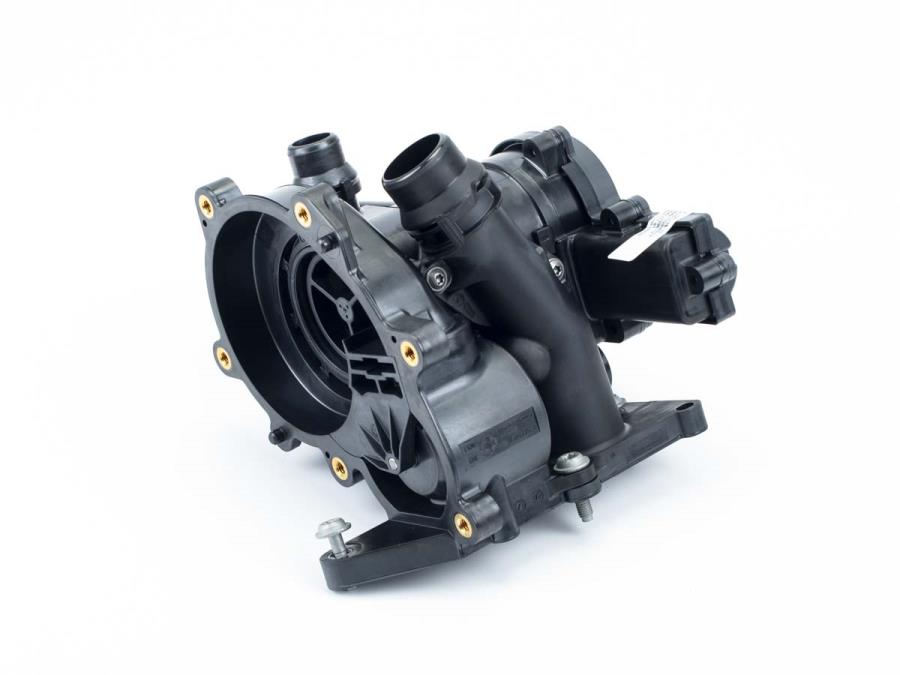
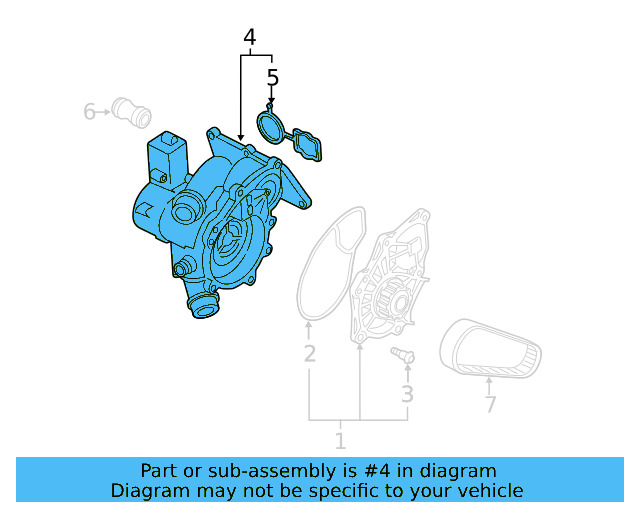

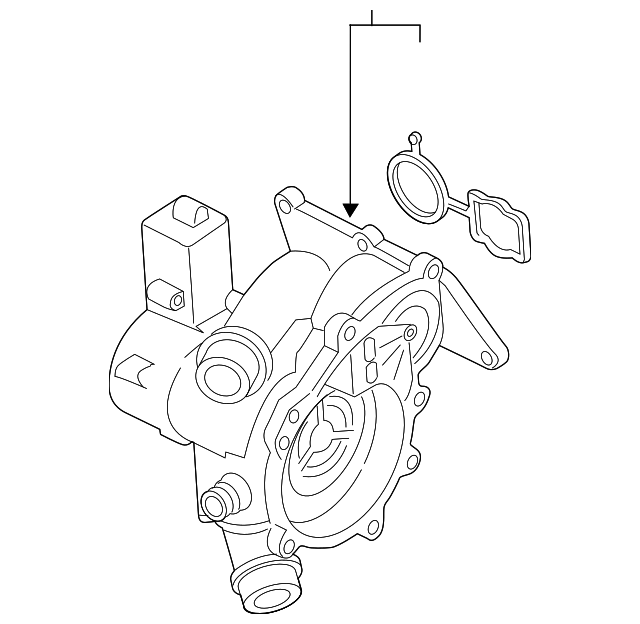
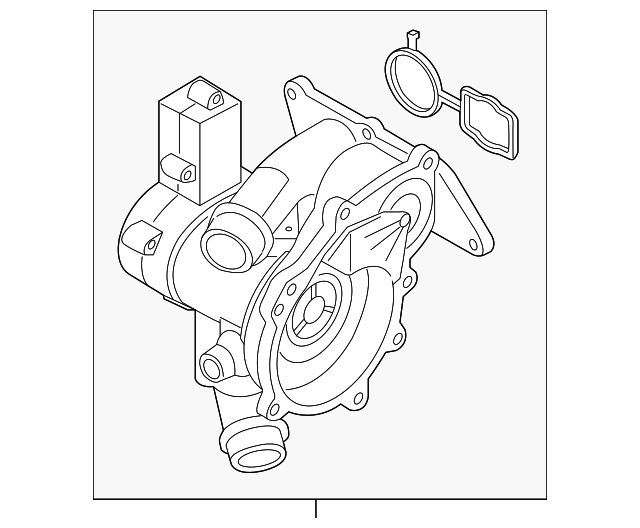


Engine Water Pump Housing 06L-121-111-P
Neglecting the water pump housing can lead to overheating, engine damage, or coolant loss. Signs of a failing housing include visible leaks, overheating warnings on the dashboard, and unusual engine noises. Addressing these issues promptly can prevent costly repairs down the line.
Choosing the OEM part number 06L-121-111-P guarantees that the replacement housing is manufactured to the same standards as the original. This ensures that it integrates seamlessly with the engine system, providing reliable performance and longevity. Counterfeit or low-quality alternatives often fail, risking engine efficiency and safety.
Available in Stores
| Seller | Price | Action |
|---|---|---|
|
ABParts
New
|
$434 | |
|
Volkswagen
New
|
$237 $170 | |
|
Reydel VW of Linden
New
|
$238 $214 |
| Seller | Price | Action |
|---|---|---|
|
Infoparts13.com.ua
Used
|
$421 | |
|
ORIGINAL AUTO
Used
|
$385 | |
|
Junk
Used
|
$143 |
| Seller | Price | Action |
|---|---|---|
|
Winn Volkswagen Woodland Hills
New
|
$217 $150 |
Vehicle Fitment
Vehicles confirmed compatible with this part

Technical Specifications
| OEM Part Number | 06L121111P |
|---|---|
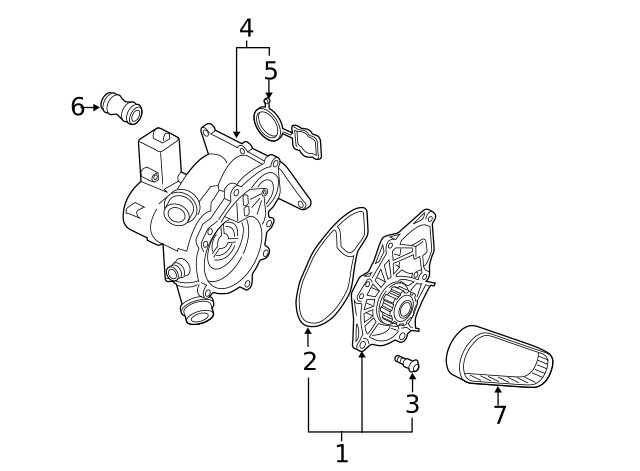
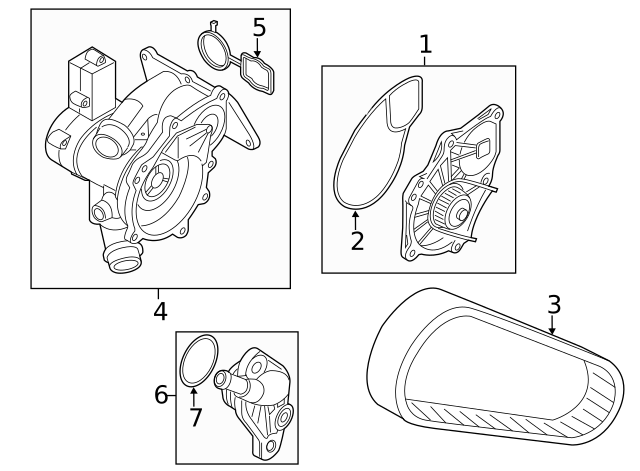
| Part Type | Thermostat Housing (Complete Assembly) |
| Included Components | Thermostat, housing body, seals |
| Compatible Engine Displacement | 1.8L, 2.0L gasoline |
| Compatible Engine Codes | DGUA, DTEA (and related VAG codes) |
| Brand Group | Volkswagen Group (Audi, VW) |
| Material | High-quality plastic or metal alloy construction |
| Dimensions | — |
| Superseded From | 06L121111F, G, H, J, K, L, M |
Includes the thermostat, housing, and seals in one unit — no separate components required for a full replacement.
Direct factory replacement for Audi and Volkswagen 1.8L and 2.0L engines, ensuring precise fit and factory-level reliability.
Replaces earlier revisions 06L121111F through 06L121111M, consolidating all prior versions into a single updated part.
Compatible Aftermarket Alternatives
The following aftermarket parts are confirmed direct equivalents for OEM 06L-121-111-P, cross-referenced from major manufacturer catalogs.
| Manufacturer | Part Number | Notes | Dimensions (mm) |
|---|---|---|---|
| URO Parts | 06L121111P | Direct aftermarket equivalent; verify compatibility with your specific model and engine code before ordering. Recommended | — |
| Audi OEM (superseded) | 06L121111M | Previous OEM revision; superseded by the P suffix. May still be found in older inventory. | — |
| Audi OEM (superseded) | 06L121111L | Earlier OEM revision; superseded. Not recommended when the P revision is available. | — |
| Audi OEM (superseded) | 06L121111K | Earlier OEM revision; superseded. Confirm with dealer that this revision is still accepted for your application. | — |
| Audi OEM (superseded) | 06L121111J | Earlier OEM revision; fully superseded by 06L121111P. | — |
Always verify fitment against your VIN before ordering.
How to Replace the Engine Water Pump Housing
Replacing the thermostat housing on VAG 1.8L and 2.0L engines is an intermediate-level repair. Allow the engine to cool completely before beginning, and have a coolant catch pan and fresh OEM-spec coolant on hand. Always refer to your vehicle's official service manual for torque specifications specific to your engine code.
-
Allow Engine to Cool and Disconnect Battery
Ensure the engine is completely cool to avoid burns from pressurized coolant. Disconnect the negative battery terminal before beginning any work.
-
Drain Engine Coolant
Place a drain pan beneath the radiator drain plug or lower coolant hose. Drain sufficient coolant to safely remove the thermostat housing without spillage. Retain the coolant if it is clean and within service life.
-
Clear Access to the Thermostat Housing
Remove any engine covers, hoses, or ancillary components that obstruct direct access to the thermostat housing. Take photos before removal to aid reassembly.
-
Disconnect Electrical Connector and Coolant Hoses
Carefully unplug the electrical connector from the thermostat housing. Release the clamps and disconnect any coolant hoses attached to the housing, noting their positions.
-
Remove Mounting Bolts and Extract the Housing
Loosen and remove all mounting bolts securing the thermostat housing to the engine block. Carefully pull the housing free, taking care not to damage the mating surface.
-
Clean the Mating Surface
Thoroughly clean the engine block mating surface, removing all traces of old sealant, gasket material, or coolant residue. A clean surface is essential for a leak-free seal.
-
Install the New Thermostat Housing
Position the new 06L121111P housing with its included seals onto the mating surface. Hand-tighten the mounting bolts, then torque them to the manufacturer's specification as listed in your service manual. Reconnect all coolant hoses and the electrical connector.
-
Refill Coolant, Reconnect Battery, and Test
Refill the cooling system with the correct OEM-specified coolant mixture. Reconnect the negative battery terminal. Start the engine and allow it to reach operating temperature, checking carefully for leaks around the housing and monitoring the temperature gauge for normal operation.
Signs of a Worn Part
-
Engine Overheating
A failed thermostat or cracked housing prevents proper coolant regulation, causing the engine to run above normal operating temperature and risk serious damage.
-
Coolant Leaks at the Housing
Cracks in the housing body or degraded seals allow coolant to escape around the thermostat housing, often visible as puddles under the vehicle or wet residue on the engine.
-
Erratic Temperature Gauge Readings
A stuck-open or stuck-closed thermostat causes the temperature gauge to read unusually low, spike erratically, or fluctuate instead of stabilizing at normal operating temperature.
-
Check Engine Light Illuminated
The engine management system monitors coolant temperature; a malfunctioning thermostat housing can trigger diagnostic trouble codes and illuminate the check engine light.
-
Unexplained Coolant Loss
A slow leak from a compromised housing seal may not pool visibly but will cause the coolant reservoir level to drop repeatedly between service intervals.
Replacement Intervals
This part does not carry a fixed mileage replacement schedule. Proactive inspection during routine cooling system maintenance — typically every 30,000–50,000 miles depending on coolant type — is the best practice for early detection of housing cracks or seal degradation.
Frequently Asked Questions
Does 06L121111P include the thermostat, or do I need to buy it separately?
Yes — the 06L121111P is a complete assembly that includes the thermostat, housing body, and seals. You do not need to purchase these components separately.
What vehicles is 06L121111P compatible with?
This part fits several Volkswagen Group vehicles with 1.8L and 2.0L gasoline engines, including the Audi A3 (2015–2024), Audi A4 (2017–2024), Audi A4 allroad (2017–2022), VW Jetta (2015–2025), and VW Tiguan (2015–2025), among others. Always confirm compatibility using your vehicle's year, model, and engine code before ordering.
Is 06L121111P the latest revision of this part?
Yes — the P suffix is the most current revision as of this listing. It supersedes all earlier revisions: 06L121111F, G, H, J, K, L, and M. If you have an older revision in stock, the P version is the correct replacement.
Can I use an aftermarket thermostat housing instead of the OEM part?
Aftermarket options such as the URO Parts equivalent are available at a lower price point. However, OEM is recommended for long-term reliability, especially since this housing integrates directly with the engine management system's temperature sensor. Always verify fitment for your specific engine code when choosing aftermarket.
What coolant should I use when refilling after replacing this housing on a VAG vehicle?
Volkswagen Group vehicles require specific coolant — typically G13 or G12 EVO (pink/purple) depending on model year. Using the wrong coolant type can cause seal damage and corrosion. Check your owner's manual or the coolant reservoir cap for the correct specification.
Do I need special tools to replace the thermostat housing?
In most cases, basic hand tools (sockets, ratchets, pliers for hose clamps) are sufficient. A coolant catch pan is required. Torque values must be followed to avoid cracking the housing, so a torque wrench is essential. Refer to your vehicle's service manual for exact torque specifications for your engine code.
Found an Error?
Help us improve! If you've spotted an error on the site or in the data, let us know and we'll fix it as soon as possible.