
 PL
PL
 Deutsch
 English
 русский
 українська

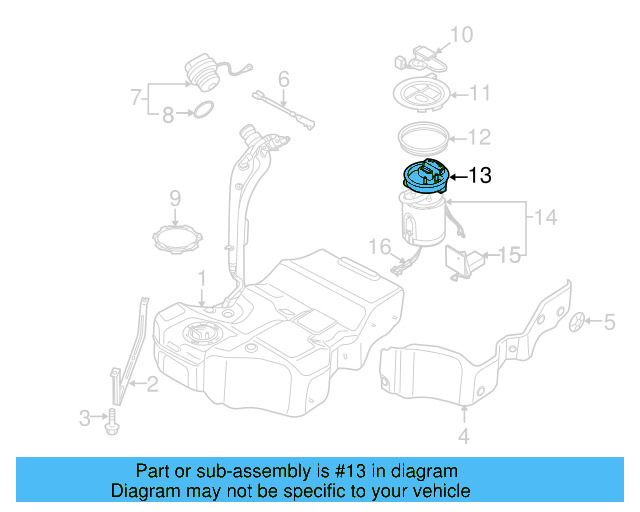
Fuel Pump Assembly 5Q0-919-051-CN
Dostępne w sklepach 6 ofert
Dopasowanie do pojazdu 10 pojazdów
| Rok | Marka | Model | Nadwozie i wersja | Silnik | |
|---|---|---|---|---|---|
| 2024 | Volkswagen | GTI | Autobahn | 2.0L L4 - Gas | |
| 2024 | Volkswagen | GTI | S | 2.0L L4 - Gas | |
| 2024 | Volkswagen | GTI | SE | 2.0L L4 - Gas | |
| 2023 | Volkswagen | GTI | 40th Anniversary Edition | 2.0L L4 - Gas | |
| 2023 | Volkswagen | GTI | Autobahn | 2.0L L4 - Gas | |
| 2023 | Volkswagen | GTI | S | 2.0L L4 - Gas | |
| 2023 | Volkswagen | GTI | SE | 2.0L L4 - Gas | |
| 2022 | Volkswagen | GTI | Autobahn | 2.0L L4 - Gas | |
| 2022 | Volkswagen | GTI | S | 2.0L L4 - Gas | |
| 2022 | Volkswagen | GTI | SE | 2.0L L4 - Gas |

Specyfikacja techniczna
| OEM Part Number | 5Q0919051CN |
|---|---|
| Part Type | Electric In-Tank Fuel Pump and Sender Assembly |
| Fuel Type Compatibility | Petrol (gasoline) and mild-hybrid (eTSI / e-TEC) only |
| Platform | Volkswagen Group MQB |
| Production Years | 2012–2026 |
| Pre-Filter / Strainer | Integrated (included in assembly) |
| Sender Type | Fuel level sender (integrated) |
| Material | Fuel-resistant engineering plastics and metals |
| Installation Location | In-tank, accessed via rear seat or trunk floor panel |
| Replacement Interval | On-condition / as needed — no scheduled interval |
Jak wymienić Fuel Pump Assembly
Replacing the 5Q0919051CN fuel pump and sender assembly is an intermediate-level repair that requires depressurizing the fuel system, accessing the in-tank unit from the cabin floor, and carefully handling fuel lines. Always work in a well-ventilated area away from ignition sources. Consult the factory workshop manual for model-specific torque values and wiring diagrams before beginning.
-
Safety Preparation
Disconnect the negative battery terminal and allow the vehicle to sit for at least 10 minutes to depressurize the fuel system. Ensure the work area is well-ventilated and free of open flames or sparks. Have an approved fuel container and absorbent rags available.
-
Access the Fuel Pump Module
Fold or remove the rear seat cushion (or lift the trunk floor panel, depending on model). Pull back the carpet and foam insulation to expose the plastic fuel pump access cover on top of the fuel tank.
-
Disconnect Electrical and Fuel Line Connections
Unplug the electrical connector from the pump/sender unit. Using appropriate fuel line disconnect tools, carefully release and remove the fuel supply line and any return or vent lines connected to the module. Be prepared for residual fuel spillage.
-
Remove the Retaining Ring and Extract the Assembly
Using a fuel pump lock ring tool (spanner wrench) sized for VW Group applications, rotate the retaining ring counter-clockwise to release it. Carefully lift the pump and sender assembly straight up, tilting slightly as needed to clear the float arm without bending it. Note the orientation arrow on the flange for reinstallation.
-
Prepare and Install the New Assembly
Transfer any reusable sealing rings or gaskets if not supplied with the new unit (always prefer a new seal). Align the orientation arrow on the new 5Q0919051CN assembly with the mark on the tank collar. Lower the unit carefully into the tank, ensuring the float arm is correctly positioned and not kinked.
-
Secure the Retaining Ring
Hand-thread the retaining ring clockwise, then tighten with the lock ring tool to the torque specification listed in the vehicle workshop manual. Do not over-tighten, as the tank collar threads can crack.
-
Reconnect Lines and Electrical Connector
Reattach all fuel lines until each quick-connect clicks securely into place. Plug in the electrical connector. Double-check that no lines are kinked or improperly seated.
-
Test and Reassemble
Reconnect the battery. Turn the ignition to the 'on' position (without cranking) two or three times to prime the fuel system and check for leaks before starting. Start the engine, verify no fuel odor or visible leaks, and confirm the fuel gauge reads correctly. Reinstall insulation, carpet, and seat cushion.
Oznaki zużycia części
-
Engine Sputtering at High Speed
A failing pump struggles to maintain adequate fuel pressure under high-demand conditions, causing the engine to misfire or sputter when accelerating at highway speeds.
-
Loss of Power Under Load
When the pump cannot deliver sufficient fuel volume during hard acceleration or climbing hills, the engine may feel sluggish or go into a reduced-power mode.
-
Difficulty Starting
A worn pump may not build adequate fuel rail pressure during cranking, resulting in extended crank times, hard starts, or a no-start condition — especially when the engine is hot.
-
Engine Stalling
Intermittent pump failure can cut fuel supply unexpectedly, causing the engine to stall at idle or during low-speed driving, sometimes without warning.
-
Whining Noise from Fuel Tank
An audible high-pitched whine or buzz from the rear of the vehicle — particularly noticeable when the ignition is first turned on — indicates a pump motor that is wearing out or running dry.
-
Inaccurate Fuel Level Gauge
Since this is a combined pump and sender unit, a failed sender component will cause the dashboard fuel gauge to read incorrectly, stick at one position, or fluctuate erratically.
Częstotliwość wymiany
There is no time- or mileage-based service interval for this component. Replacement is driven entirely by symptoms, fault codes (e.g., P0087, P0628, sending unit DTCs), or confirmed fuel pressure test results below manufacturer specification.
Najczęściej zadawane pytania
Will part number 5Q0919051CN fit my vehicle?
This assembly is designed for MQB-platform Volkswagen Group petrol and mild-hybrid vehicles including Golf VII, Golf VIII, T-Roc, Audi A3 (8V and 8Y), SEAT Leon (KL), CUPRA Formentor, and Škoda Octavia IV produced between 2012 and 2026. Always verify fitment by cross-referencing your 17-digit VIN with the dealer parts system before purchasing, as trim level, engine code, and fuel type all affect compatibility.
Does this part replace older numbers like 5Q0919051AA or 5Q0919051BC?
Yes. The CN revision supersedes earlier OEM numbers including 5Q0919051AA, 5Q0919051BC, 5Q0919051CB, 5Q0919051CC, and 5Q0919051GB. The CN part is the current production version and is a direct drop-in replacement for all of these earlier revisions.
Is this fuel pump compatible with diesel or plug-in hybrid variants?
No. Part 5Q0919051CN is specifically designed for petrol (gasoline) and mild-hybrid (eTSI/e-TEC) engines only. It is not suitable for diesel, compressed natural gas (CNG), or plug-in hybrid (GTE/PHEV) variants. Installing this part in an incompatible application will result in immediate failure.
Can I install this fuel pump myself, or does it require a professional?
An experienced DIYer with basic mechanical knowledge and the correct tools — particularly a VW-specific fuel pump lock ring spanner — can complete this repair. However, working with fuel systems involves fire and health hazards. If you are not comfortable handling fuel lines or do not have the proper tools, it is strongly recommended to have the repair performed by a qualified technician.
Does the new assembly include a new O-ring or gasket?
OEM assemblies from Volkswagen Group typically include a new sealing ring, but verify the contents of your specific package upon receipt. Never reuse the old O-ring or gasket — a fresh seal is essential to prevent fuel leaks after installation.
What fault codes are associated with a failing 5Q0919051CN?
Common diagnostic trouble codes linked to fuel pump and sender failure on MQB-platform vehicles include P0087 (fuel rail pressure too low), P0627/P0628 (fuel pump control circuit), and sender-related codes indicating implausible or stuck fuel level signals. Always perform a fuel pressure test and read live data with VCDS or an OEM-level scan tool to confirm the diagnosis before replacing the assembly.
Znalazłeś błąd?
Pomóż nam się rozwijać — jeśli zauważyłeś błąd na stronie lub w danych, daj nam znać, a naprawimy go jak najszybciej.